Best Fan for Dry Age Beef
The Perfect How To Dry Age Beef At Home Guide
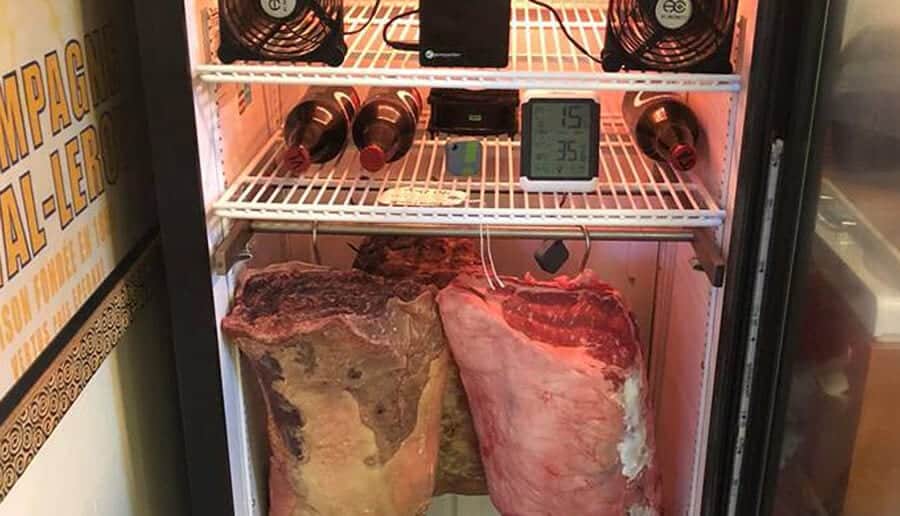
Today someone in this group mentioned that there is not a good tutorial anywhere on the net for beginners, I reached to Bryan Laschiver from Dry Aged Beef who is an expert and consulting for dry aging.
I asked him to share with us his wonderful guide on how to start dry at home. Luckily he agreed. Here we go.
Disclaimer: We do not support any dry-aging companies, so if you want to know about Umai or Steakager specific info please join those groups. This group is primarily do-it-yourself and is full of Dry Aging knowledge.
First, let's talk about equipment.
Many options out there folks. There are many refrigerators, cold boxes, chest freezers and beverage coolers that will work. Some will definitely be more problematic than others. My first do-it-yourself machine was an Edgestar beverage cooler.
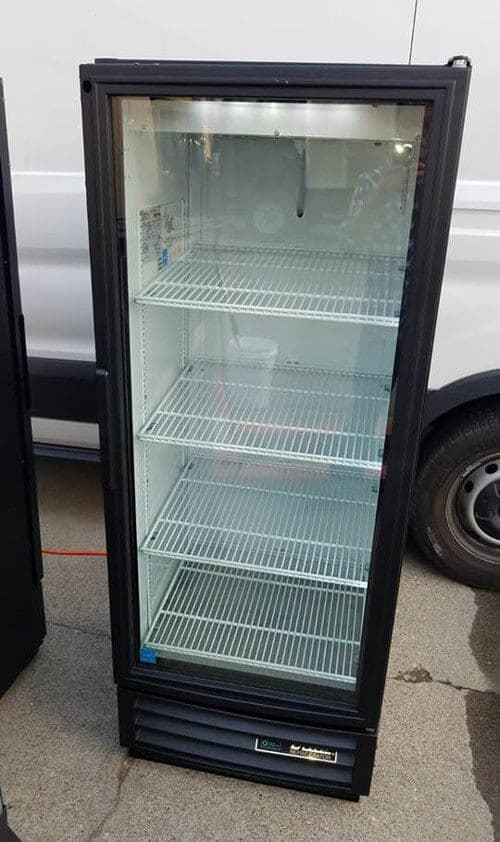
What a beauty, almost brand new True GDM-12
The low-temperature model (important to get "low temp" if it's a beverage cooler). The BWC120sslt. What I found later was that I had purchased a coldplate model, almost all beverage coolers are. It was an inexpensive option so I thought it was a great idea until I learned that coldplate systems have a tendency to freeze up.
Steakagers are all coldplates and will freeze up. A good fix to that is to make sure you have a muffin fan pointed directly at the coldplate, I hung my Muffin Fan from a rack (pictured as Muffin fan). Coldplate units are also quite a bit lower on the humidity side.
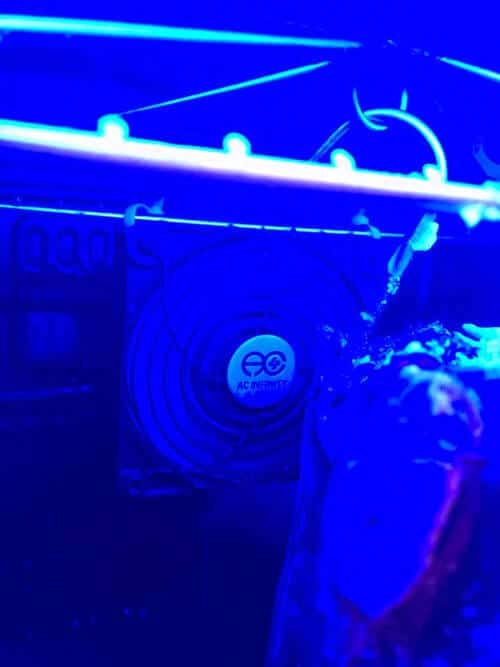
I spent many hours adding humidifying systems, timers and switches. I also purchased an Inkbird humidity system. After a bit of frustration and a couple of low humidity ages, I decided to make life easy on myself and to bite the bullet and buy a commercial unit.
Most commercial units are what they call a "forced fan evaporator" type unit. This is like the beverage refrigerators you see at 7-Eleven or in grocery stores, no coldplate in the back but an actual compressor, blower, and condenser.
They don't just come in the large sizes, you can find some as small as a mini-fridge (pictured as GDM-5). You can find these used in many places…Craigslist, appliance stores, and appliance repair places, in both used & new conditions. Sometimes you can find used for $100-$400 depending on size and condition so you can build a very nice ager for $300.
But if you're going to go new get ready to drop some serious coin! However, they will make your life much easier and they come in many many different sizes, price points, shapes and hold great temperature and humidity. Once you bring it home (used or new) make sure you clean the inside with water and bleach or Simple Green.
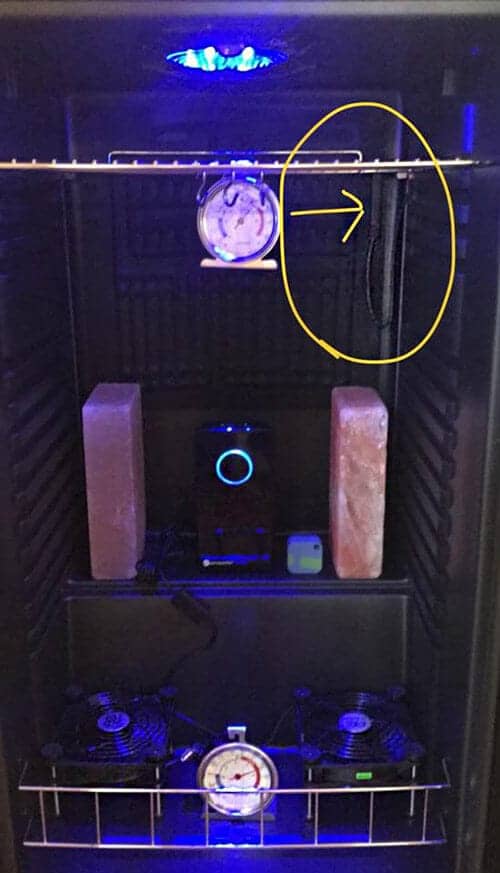
Steakagers: do you guys have a thermostat right here like this coldplate model?
If you do you want to try to keep that from icing over because that will tell your machine it is 32° whether it is or it isn't… A modification we used to do (that will probably void your warranty) is to actually remove that thermostat from the coldplate.
There are also some professional-grade dry aging machines on the market that are not coldplate models that you can find from Cabela's and a few places like that but they are grossly expensive and you can build the identical thing for less than half. They are basically built out of A commercial quality fridge.
True GDM is a great line to look into if you want to find a forced fan evaporator type refrigerator to construct a dry aging machine yourself. Other companies that make this type are Beverage air, Habco, Hussman, Idw, Max cold, Summit, Frugal, qbd, and Traulsen.
You can also use any chest freezer with an inkbird, this will hold the best temp of all and you can find them used for dirt cheap but you can't see your meat 😜 but according to Mr.Freeze (our resident cooling specialist), a chest freezer is a great option.
One thing you do you want to watch out for is condensation on the lid, you don't want any water droplets dropping on your sub-primal when you open and close the door because you're exposing the sub-primal to more bacteria. You can also make a coldplate model work, it will just take a little bit of tinkering, definitely a fan on the plate is needed and then you are going to need to tackle humidity because they run dryer then you want.
Lastly, Dry aging in your main kitchen refrigerator is far from ideal do you to opening and closing the door, as well as possible contamination. Get yourself a dedicated system.
What you need:
Whatever refrigerator or beverage cooler you get you will need to make sure you maintain an average temperature under 40° (4°C) and above 32° (0°C).
Air circulation is also very important so you will need some fans.
AC Infinity makes some great fans and you can find them on Amazon. I have an AXIAL 1238 big boy in the back pointing down and two model S7 duel fans. These are nice because they are USB powered and my Germ Guardian sanitizers have a USB jack in each one. My set up absolutely does not need two, it is major overkill but I have been known to put beer/cider bottles in the bottom without sanitizing them (not ideal😉). Vessels should be wiped down with an alcohol swab to be safe.
You should have something to prevent negative bacterial growth. You can get UV-C lights or you can also search Amazon for Germ Guardian pluggable sanitizer as I mentioned above. I prefer the Guardian because a UVC light can be bad for your eyes.
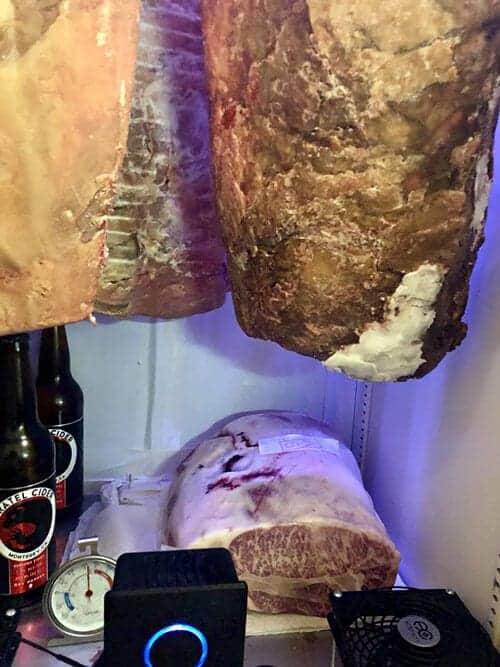
Nice A-5 Wagyu ribeye hangin' out down there at the bottom…
Someone mentioned UVC does not pass through the glass, that's great but you have to open that door at some point. If you go this route you will need to make sure no one sees the light, and remember kids & pets are at ground level so the light should not be visible at any angle.
My personal choice is a Germ Guardian just because I don't want to take any chances with the light spectrum. Also, make sure you put your germ Guardian near the intake fan. Most will be at the top of the unit.
Next, You should also have a reliable readout for humidity and temperature so I not only have cheap Taylor temperature gauges but also a few SensorPush gauges. Govee makes a sensor as well. I'm personally a bit more partial to the SensorPush but this is personal preference. Whichever sensor you decide on these are very important tools. They connect to your smartphone and can tell you temperature and humidity remotely (some require a gateway for remote monitoring).
Electricity
You can do this a couple of ways, you can put an extension cord through the door if it's not too thick (kind of ghetto in my opinion), you can run an extension cord up a drain plug if you have one. You can do what I think is the most common way and find an area in the side that does not have any components and drill a hole through the sidewall, run your cord and seal up the hole where your cord is going through with some silicone or something.
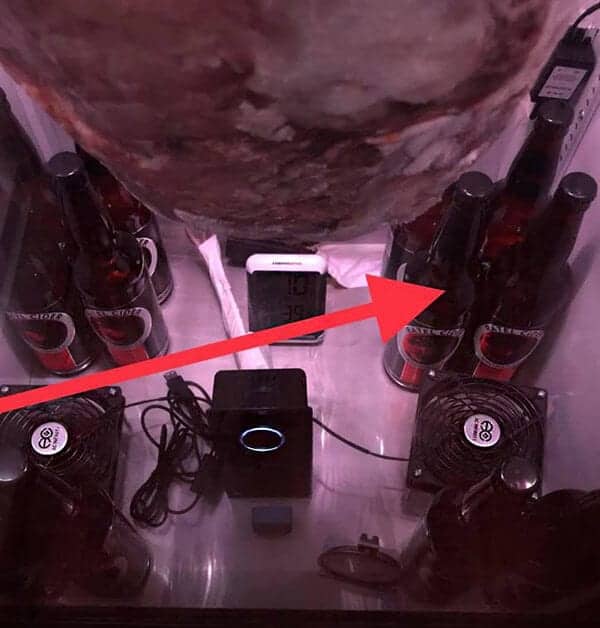
Right behind those bottles, there's a little hole drilled for the power cord
When I ran my power cord into the side of my unit I made sure to go to the hardware store and get an extension cord replacement plug, then I removed the extension chords original head, put the cord through the very tight hole I had drilled, and then put on the replacement head-on once it was inside the unit…(Look in pictures)
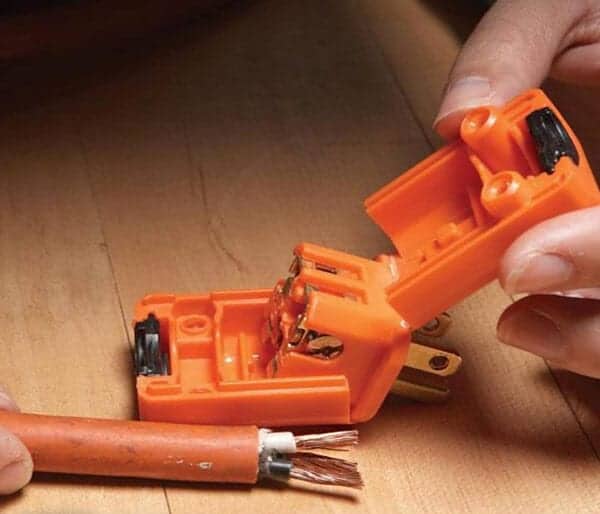
You can find a replacement plug like this, slice the one-off of your extension cord, feed the cord through the little hole you drilled or up through your drain hole and attach this one, VOILA, Instant power!
Environment
The temperature should be between 32° (0°C) and 40° (4°C). Exceeding 40° (4°C) could cause spoilage. Personally I like my average to be around 35°-37° (0°C-2.7°C). You can get an Inkbird or some other temperature controller to help with this if you need. Keep in mind some commercial refrigerators besides True may need some wiring, another reason I like True.
Also, cold bottles of water or beer are a wonderful addition to your aging box because they will help keep temperature stabilized. The first thing to understand is your machine will have its own natural humidity that is unique because of the machine & your local environment.
Humidity should be between 70% and 85% for the majority of the age. Many people do not worry about humidity and don't think it matters. I personally disagree with this after lots of trial, error, and learning. If you remember I mentioned I started with a cold plate model (actually, had a little Steakager in the very beginning but that's another story).
With my first do-it-yourself machine humidity was always very low, 50% a lot of the time. My sub-primal at this time had a lot more loss and was not quite as moist. After I put a donut humidifier in conjunction with an iSwitch smart socket I was able to get my humidity from the 50% range up to mid to high 60% range.

Both myself and my friends noticed a big difference and I did not lead them with the questioning, in almost every case they said before I mentioned anything, "these steaks are better than the last ones" or "juicier, what did you do differently"?! So as far as humidity goes, I am convinced it makes a difference.
If you haven't seen it yet go to YouTube and look at the George Motz film The Science Of Dry Aging hosted by Nick Solares. You will see the expert explain that you want to slow the migration of the moisture. They don't mention that you will actually have a thicker, harder pellicle, and you will lose more weight loss if your humidity is too low. In a few spots in the film they have segments in Debraggas New York Butchery, it's not said in the film but I know for a fact their room is at 76%! So forget what the others say, keep your humidity between 70% and 85%.
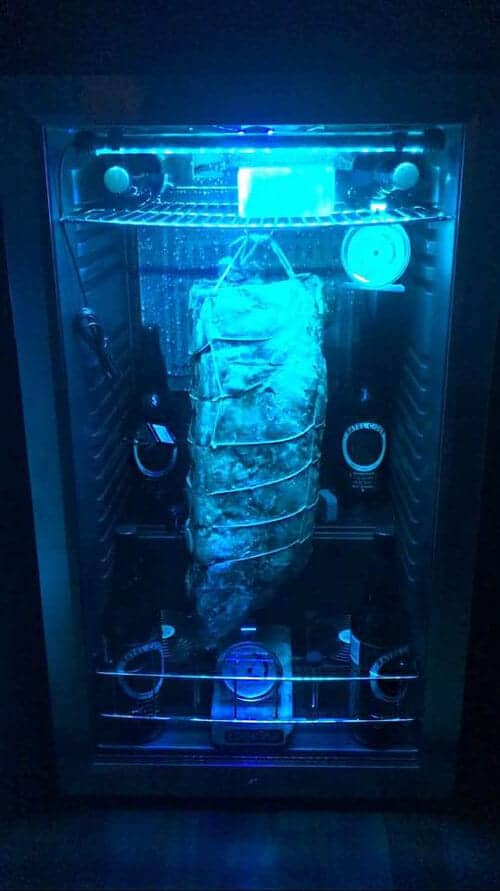
My 2nd machine was an Edgestar BWC120SSLT. Coldplate set-ups are a huge pain. This picture was taken right before I learned installing a fan that hangs from the rack pointed directly at the coldplate will make everything run far more consistently.
Note: your machine's humidity is different than the humidity readings you get when you have a piece of meat in. When you first put a primal in your ager the humidity will skyrocket because the primal is moist and wet, then the humidity will slowly lower. To know your machines true humidity keeps it empty for a few days and check your SensorPush for the humidity averages.
The SALT debate
The "IS SALT NEEDED" argument comes up a lot when it comes to dry aging. I am a sponge for knowledge but want to make sure I get the correct knowledge. So a few months ago I actually contacted Debragga's in New York. They are one of the best dry aging companies around and talked to one of their long-time dry-aging butchers. He gave me the lowdown on the salt tip.
Salt was used to control humidity and odor way back in the day when people didn't have the same technology that we do now. The early refrigeration systems were just ice and that made an extremely moist atmosphere and there was a lot of rot and mold. Now we refrigerate under a much dryer environment. A lot of guys like to use salt because it "feels" more old-school or the right way to do it but according to most major dry aging outfits, it is not necessary.
Meat
You can dry age almost any primal, but not single steaks. Some popular primals are ribeye roast, New York strips, briskets, sirloins. If it mooed, it's good! 👍🏼
Hanging or on a rack
It's a personal preference. Lots of people put their primals on the racks and some hang them. Personally, I am a big fan of hanging them. Try to avoid a refrigerator or unit where you have to cut up your primal's.
How long should I age for?
Start small with a 28 or 35 day age, then try a 40 day, then the 60, then a 90… really it's all personal preference. I just did a 120 Day Tomahawk Ribeye and it was fantastic!
What is Pellicle?
The hard shell of dried meat that forms. DO NOT THROW AWAY! This stuff is gold, ladies and gentlemen! Perfect to grind up to add to fresh ground beef to make dry aged burgers, meatloaf, sausages. You can add it to pasta sauce, soup stock or even make beef jerky out of it!
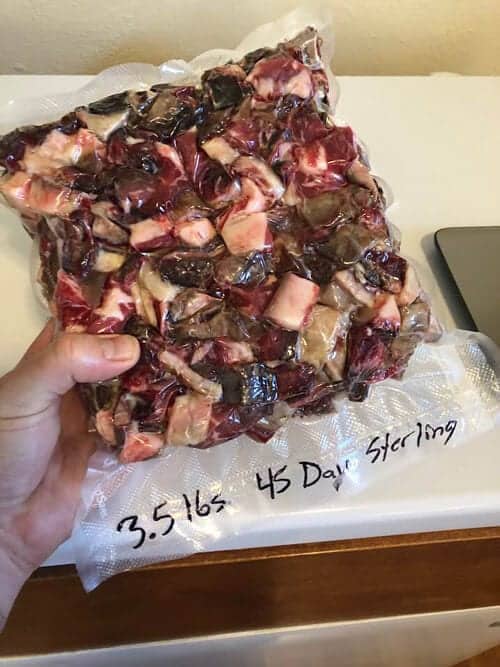
Do not throw away the pellicle!!! Grind this up and add it to burger meat, make pasta sauce, soups, stock, meatloaf, pretty much anything that you want to add a nice aged beef flavor to!
Cost breakdown....
First I would like to state I paid quite a bit more for my fridge then most because it was only one year old, had been used very very little and was in mint condition…
However I've seen some this size for as low as $100 or even free…
2 Guardians are not needed and overkill! One will clean 18 cubic feet of air.
I know a lot of people like UVC light bulb but this can be very very dangerous, it will ruin your sight very quickly and lots of people don't think about it and cover the light at their eye level but then end up blinding their dogs and cats and kids because from way down at ground level if you can see the light it is bad, the Germ Guardian in my opinion is the way to go!
Also you're not putting UV rays on the meat, the Germ Guardian is sterilizing the air!
SensorPush! Not vital but it does make things handy
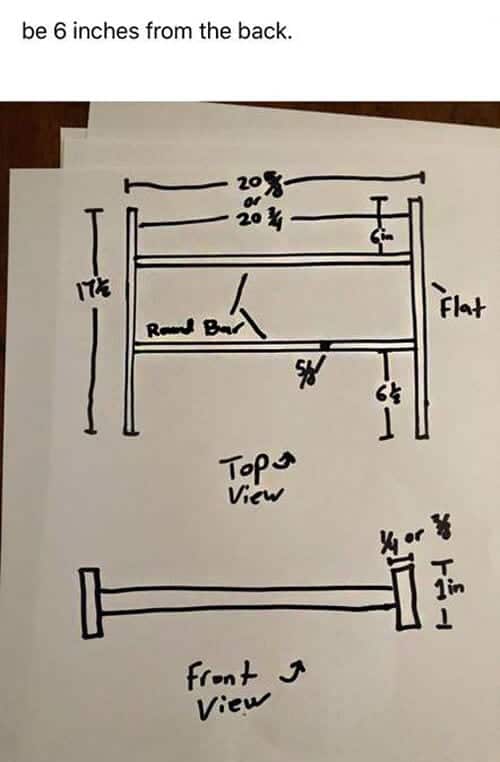
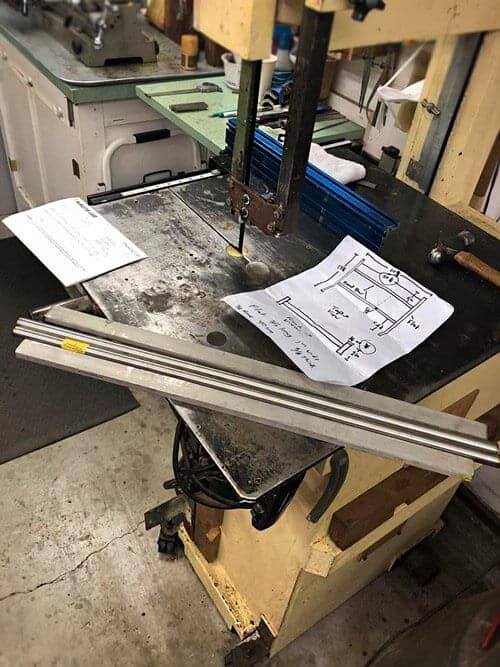
These are plans for a custom steel hanging rack that will support 200 pounds!
Hanging rack Fabrication.
(your current rack will support over 80 pounds so you do not need to build one of these if you do not want to)
8. (1) LED light bar
Luckily I never needed to use the humidity controller… my new True hold a wonderful 77% humidity. In my coldplate beverage cooler I just put A simple donut humidifier in…. coldplates are very low on humidity and this is bad, people don't understand you don't want to dry out too fast, you want the migration of moisture to be slow…
If your humidity is below 70% you should remedy that because you will have a product that is way way too dense and dry.
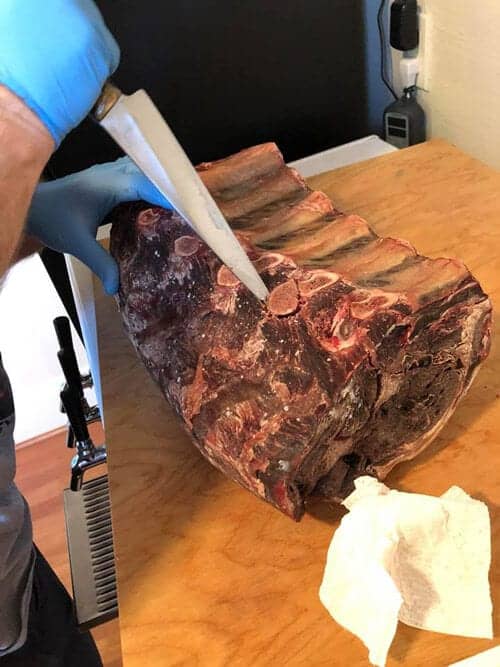
Lastly, make sure you have some good quality knives. I love the Japanese Honesuki to debone and remove these point bones (also known as Chine Bones)
Latest Posts
Source: https://www.artisansmoker.com/pitmasters-area/become-a-pitmaster/the-perfect-how-to-dry-age-beef-at-home-guide/
0 Response to "Best Fan for Dry Age Beef"
إرسال تعليق